Remark : Spring 4.0 이상에서 Controller 추가시 @RestController 를 사용한다.
Spring MVC에서 Controller를 구성할 때 @Controller를 사용하면 return하는 값은 사용할 jsp에 대한 정보를 가진다.
그런데 @RestController를 통해서 return을 하게 되면 리턴값 자체를 브라우저로 전달하는 응답결과로 생성하여 보내게 된다. 예를들어 return “result”; 하면 result라는 문자열이 데이터로서 전달 된다고 할 수 있겠다.
1.demo 에서 -> Add Frameworks Support
Spring-Spring MVC 추가

2.Controller 파일은 com.example.demo 밑 아무 디렉토리에 있어도 된다.
@Controller 가 아닌 @RestController 로 적어준다.

3.소스
|
1 2 3 4 5 6 7 8 9 10 11 12 13 14 15 16 17 18 19 20 21 22 23 24 25 26 27 28 29 30 31 32 33 34 35 36 |
package com.example.demo.controller; import org.springframework.http.HttpStatus; import org.springframework.http.ResponseEntity; import org.springframework.web.bind.annotation.RequestBody; import org.springframework.web.bind.annotation.RequestMapping; import org.springframework.web.bind.annotation.RequestParam; import org.springframework.web.bind.annotation.RestController; import vo.JsonRqVo; //model class 없으면 helloWorld3 삭제 @RestController public class HelloWorldController { @RequestMapping("/") public String helloWorld(@RequestParam String name){ return "Hello World from Spring Boot : " + name ; } @RequestMapping("/goodbye") public String helloWorld2(){ return "Goodbye from Spring Boot"; } @RequestMapping("/json") public ResponseEntity<JsonRqVo> helloWorld3(@RequestBody JsonRqVo jsonRqVo) { JsonRqVo jsonRqVo2 = new JsonRqVo(); jsonRqVo2 = jsonRqVo; return ResponseEntity.status(HttpStatus.OK).body(jsonRqVo2); } } |
4.실행
http://localhost:8080/goodbye

5. View 로 호출 하기
– GretingController 클래스를 만든다.

6. GreetingController 소스
|
1 2 3 4 5 6 7 8 9 10 11 12 13 14 15 16 17 |
package com.example.demo.controller; import org.springframework.stereotype.Controller; import org.springframework.ui.Model; import org.springframework.web.bind.annotation.GetMapping; import org.springframework.web.bind.annotation.RequestParam; @Controller public class GreetingController { @GetMapping("/greeting") public String greeting(@RequestParam(name="name", required=false, defaultValue="World") String name, Model model) { model.addAttribute("name", name); return "greeting"; } } |
7. View 만들기
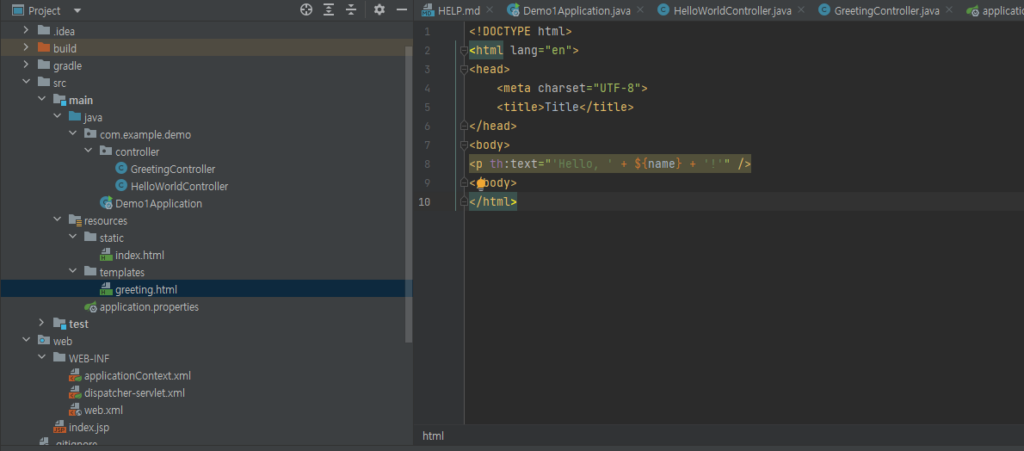
templates 밑에 – greeting.html 만들기
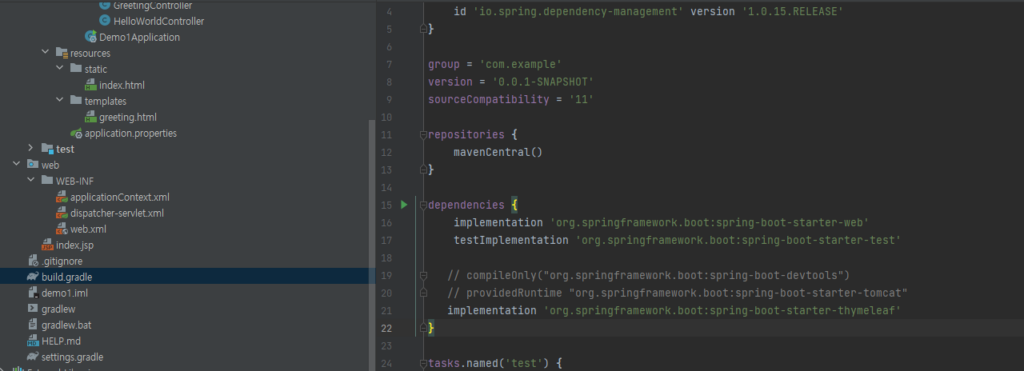
implementation ‘org.springframework.boot:spring-boot-starter-thymeleaf’ 추가 필요

thymeleaf 사용 //

8. greeting.html 소스
|
1 2 3 4 5 6 7 8 9 10 11 12 |
<!DOCTYPE html> <html lang="en"> <head> <meta charset="UTF-8"> <title>Title</title> </head> <body> <p th:text="'Hello, ' + ${name} + '!'" /> </body> </html> |
@Controller 로 적어준다.
9.실행
http://localhost:8080/greeting?name=User

